Symbaloo is a great way to share bookmarks, but with a little creativity a webmix can become an online lesson or workshop. I created a vocabulary workshop that educators could participate in without my instruction. I use the webmix in my face-to-face workshop but wanted to test the limits of Symbaloo. I discovered that with a little creativity, Symbaloo can do some cool things.
The vocab workshop is my first attempt, but wanted to share a few things I learned while building the webmix so that you can avoid some hurdles when you create a webmix lesson. Feel free to contact me with any questions or cool ideas you have using Symbaloo. Let’s look at how to build a webmix lesson / workshop with a webmix.
 First issue was navigating through the webmix. The basic path I developed was top left to bottom right. This created two hurdles.
First hurdle, how to “tell” someone where to go and what to do. I decide to use Tellagami and Youtube. I created instructional videos with Tellagami and uploaded them to Youtube so that the videos could be embedded into the webmix. There are other options, like Voki, but the participants would be directed to a web page outside of the webmix. Not a huge deal, I just wanted to keep participates in the workshop webmix as much as possible. I unlisted the Tellagami videos on Youtube simply because I didn’t want random traffic to the videos.
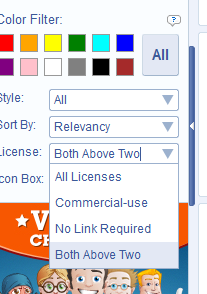
Second hurdle for navigation was the use of arrow icons to direct participates to the next section. You can not have an “empty” tile in a webmix. Tiles have to connect to something. I decided to have a little fun and created a quick Tellagami video that informs the participate to follow the arrow. I personalized the arrow tiles by uploading the image when I created the tile. My favorite site for finding icons is FindIcons. There is a search option to find icons under creative commons.
The “arrows,” “start here”, and “thank you” icons were found on FindIcons.
I also decided to use arrows with text to provided information about the websites and the videos. These tiles are connected to an embedded Google doc. Participates can decide on which videos or websites they are interested in before they click on a tile. For the words on the tile I used Canva and the title option in Symbaloo to direct participants what the next step was in the webmix.
The second issue was how to create some interaction for the participants. I decided to use Google Forms, which can be embedded in the webmix. The first form was designed to consider how much new vocabulary is introduced to students. I then created a tile that links to the results so participants could view and consider the answers from other people. The Article Review form was designed to go to different questions based on what article someone chooses to read. The result page shows answers to all the questions.
The final step was to use the marker option to visually group parts of the workshop together with a color. Participates can jump around in the webmix or follow along with the directions. I hope by sharing the steps and hurdles I went through it spurs some creative ways for you to use Symbaloo in a lesson / workshop way for your classroom. If I can help in anyway, please feel free to contact me on Twitter or in the comment section.


